Build the perfect garden fence with our step-by-step guide. Learn how to install a durable, attractive fence for your New Zealand yard.
Creating a new boundary for your property is incredibly rewarding. It instantly boosts your home’s privacy while providing a much-needed layer of security for your family.
Beyond the practical benefits, this project adds significant curb appeal to your residence. Whether you want to define your space or keep pets contained, a well-crafted structure makes a lasting difference.

Our guide walks you through every stage of the process. We cover everything from initial planning and legal compliance to the final finishing touches. By following these professional steps, you ensure your project stands strong against the unique New Zealand climate.
You can complete this DIY task with confidence and precision. Let’s get started on transforming your outdoor space today.
Key Takeaways
- Understand local council regulations and boundary rules before starting construction.
- Select durable materials that can withstand the specific weather conditions in New Zealand.
- Proper planning prevents costly mistakes and ensures a sturdy, long-lasting result.
- Focus on accurate measurements to maintain structural integrity and visual appeal.
- Finishing touches like staining or painting protect your investment from the elements.
Planning and Legal Requirements for New Zealand Fences
Before you start digging holes for your new fence, you need to navigate the legal landscape of property boundaries. Taking the time to research New Zealand fencing regulations early on will prevent costly mistakes and ensure your project stays on track. A well-planned fence is not just a physical barrier; it is a legal agreement between you and your surroundings.
Understanding the Fencing Act 1978
The Fencing Act 1978 requirements serve as the foundation for most boundary disputes and construction projects in the country. This legislation outlines the responsibilities of neighbors when it comes to the cost and maintenance of a shared boundary fence. Generally, the law assumes that both parties benefit from the structure and should share the expenses equally.
“Good fences make good neighbors.”
It is crucial to review these rules before purchasing materials. If you intend to build a fence that exceeds the standard requirements, you may be responsible for the additional costs yourself. Always document your agreements to ensure clarity for both parties involved.
Checking Local Council Bylaws and Height Restrictions
Beyond national laws, your specific region may have unique rules that you must follow. You should always check your local council website to confirm residential fence height limits and setback requirements. These bylaws are designed to maintain neighborhood aesthetics and ensure that fences do not obstruct visibility for traffic or neighbors.
Some councils require a building consent if your fence is exceptionally high or located in a specific zone. Ignoring these local mandates can lead to enforcement notices or the requirement to dismantle your hard work. Always verify your specific property zone before finalizing your design.
Discussing Plans with Neighbors
Open communication is the most effective way to ensure a smooth construction process. Even if the law allows you to proceed, discussing your plans with neighbors early on fosters goodwill and cooperation. Sharing your design and timeline helps avoid potential misunderstandings regarding the look or placement of the fence.
If you are planning a shared boundary project, try to reach a mutual agreement on the style and budget before starting. A friendly conversation often resolves concerns that might otherwise turn into formal disputes. Remember, a collaborative approach makes the entire building experience much more pleasant for everyone.
Selecting the Right Materials for Your Climate
New Zealand weather can be tough on outdoor structures, making material quality a top priority. When you look for the best fence materials NZ has to offer, you must consider the local UV intensity and moisture levels. Choosing the right components ensures your fence remains stable and attractive for many years.
Choosing Durable Timber Types like H4 Treated Pine
For posts and any wood touching the ground, H4 treated pine timber is the industry standard. This specific treatment protects the wood from rot, decay, and insect damage in damp soil conditions. Using anything less durable for ground-contact elements often leads to premature structural failure.
Selecting Galvanized or Stainless Steel Hardware
Your choice of fasteners is just as important as the wood itself. You should always use high-quality galvanized hardware for fences to prevent rust, especially if you live near the coast. Stainless steel is an even better option for harsh, salty environments where standard coatings might eventually break down.
Calculating Material Quantities and Budgeting
Accurate planning helps you avoid unnecessary waste and keeps your project within budget. Start by measuring your total fence line and dividing it by the width of your panels or post spacing. Always add a small buffer of 5% to 10% for offcuts or accidental damage during installation.
| Material Type | Best Use Case | Durability Level |
|---|---|---|
| H4 Treated Pine | Posts & Ground Contact | High |
| Galvanized Steel | General Fasteners | Medium-High |
| Stainless Steel | Coastal Environments | Very High |
| Standard Pine | Above-Ground Rails | Medium |
Essential Tools for Fence Construction
Preparing the right gear is the secret to a successful DIY fence installation. Having high-quality equipment on hand will significantly speed up your construction process and improve the overall quality of your finished fence.
Investing in the correct fence building tools saves you time and prevents frustration during the project. A well-prepared toolkit ensures that every post is aligned and every rail is secure.
Measuring and Marking Equipment
Precision is vital when you start your project. You will need a reliable long-range tape measure to map out your boundary lines accurately. A sturdy string line is also essential to keep your fence perfectly straight from start to finish.
Don’t forget to include a high-quality spirit level in your kit. Checking for plumb and level at every stage prevents structural issues later on. Using marking paint or timber stakes helps you visualize the layout before you begin digging.
Digging and Post Installation Tools
For the heavy lifting, specialized digging tools are necessary to reach the required depth for stability. A post-hole borer is a fantastic investment for New Zealand soil, as it makes creating deep, clean holes much easier than using a manual spade.
If you are working in rocky ground, a heavy-duty crowbar helps loosen stubborn stones. Keep a standard shovel nearby to clear out loose dirt from the bottom of your holes. These tools ensure your posts sit firmly in the ground, providing a solid foundation for your fence.
Cutting and Fastening Gear
Efficient cutting and fastening gear will make assembling the framework and attaching pickets much easier. A circular saw allows for quick, clean cuts on your timber rails and pickets. Always wear appropriate safety glasses when operating power tools.
A high-torque impact driver is a game-changer for driving long screws into treated pine. It provides the power needed to secure heavy framing without stripping the screw heads. A reliable hammer is also useful for smaller adjustments or driving nails into tight spots.
| Tool Category | Primary Use | Key Benefit |
|---|---|---|
| Measuring | Layout and Alignment | Ensures a straight fence line |
| Digging | Post Hole Preparation | Provides structural stability |
| Fastening | Assembly and Framing | Speeds up construction time |
How to Build a Garden Fence Step by Step
A successful DIY fence installation begins long before the first post goes into the ground. By taking the time to organize your workspace, you ensure that the final result is both sturdy and visually appealing. Following a logical sequence helps you avoid common mistakes and keeps your project on track.
Video source from youtube
Clearing the Site and Preparing the Ground
The foundation of a great fence starts with thorough preparing ground for fencing. You must clear the area of any vegetation, rocks, or loose debris that might interfere with the fence line. Removing these obstacles allows you to see the natural contours of your yard clearly.
If you have uneven terrain, consider whether you need to level the soil slightly before starting. A clean, flat surface makes it much easier to measure accurately and keeps your materials organized during the build.
Setting Out the Fence Line with String Lines
Using string lines is the most effective way to ensure your fence remains perfectly straight and aligned across your property. Start by placing stakes at the corners of your planned fence line. Pull a high-visibility string tight between these stakes to create a clear guide for your post placement.
This simple technique prevents the common issue of a “wavy” fence line. Always double-check your measurements against your property boundaries to ensure you are building in the correct location. Precision at this stage saves significant time later in the process.
Digging Post Holes to the Correct Depth
Achieving the proper fence post hole depth is crucial for long-term stability. Your posts must be anchored firmly enough to withstand New Zealand’s wind loads and natural soil movement. Generally, you should aim to bury at least one-third of the total post length underground.
The following table provides a guide for standard post hole requirements based on typical soil conditions found in many residential areas.
| Soil Type | Minimum Depth (m) | Stability Level |
|---|---|---|
| Firm Clay | 0.6m | High |
| Loose Soil | 0.8m | Medium |
| Sandy Ground | 1.0m | Low |
Remember that digging deeper in loose or sandy soil provides the extra support your fence needs to stay upright. Always check for underground utility lines before you start digging to keep your project safe and compliant.
Installing Fence Posts Securely
Setting your fence posts correctly is the secret to a structure that stands the test of time. Before you begin, ensure your fence post hole depth is consistent with local building standards to provide a solid foundation against New Zealand’s unpredictable winds.
Positioning and Leveling Posts
Once the posts are in the holes, you must check their alignment carefully. Using a spirit level is essential for leveling fence posts on both the vertical and horizontal axes.
Take your time during this step to ensure every post stands perfectly straight. Even a slight lean can cause significant issues when you eventually attach your rails or panels.
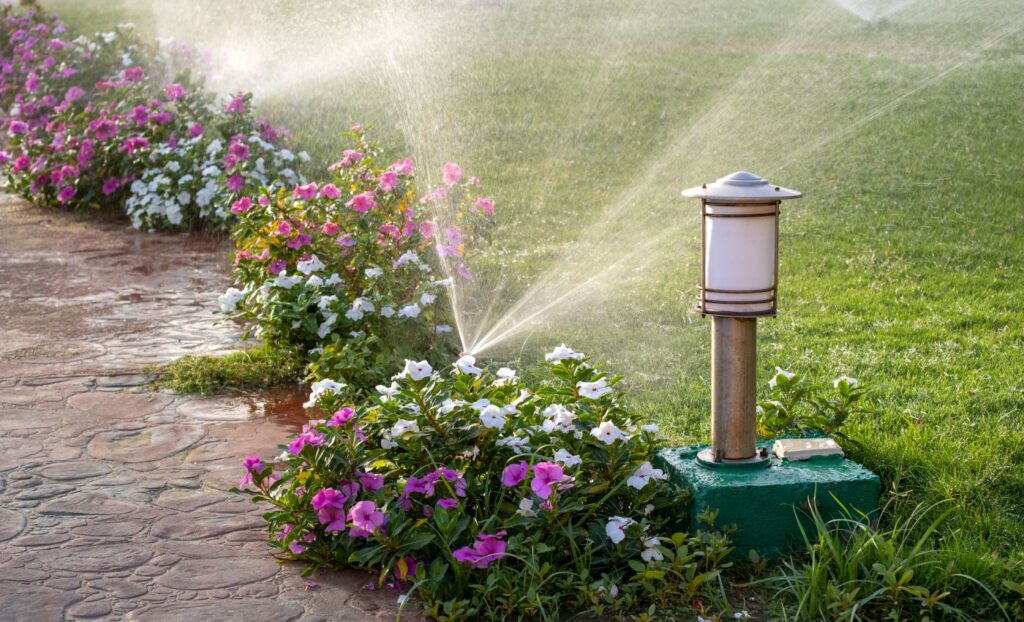
If you're based in Tauranga or nearby areas like Papamoa or Omokoroa, it's important to consider how local conditions can impact your landscaping choices. From coastal weather to soil type, these factors play a big role in how well your outdoor space performs over time.
Mixing and Pouring Concrete for Stability
After you are satisfied with the alignment, it is time to lock the posts in place. Using a high-quality concrete fence post mix is the best way to guarantee long-term stability.
Pour the mixture evenly around the base of the post, ensuring there are no air pockets trapped inside. You can use a shovel or a rod to gently agitate the wet concrete, which helps it settle firmly against the timber and the surrounding soil.
Allowing Proper Curing Time for Concrete
Patience is a virtue when building a fence. You must allow the concrete the proper curing time recommended by the manufacturer before adding any weight to the posts.
If you rush this process, you risk shifting the posts and compromising the structural integrity of your entire project. Wait at least 24 to 48 hours to ensure the concrete has reached sufficient strength to support your framing and pickets.
Attaching Rails and Framing
Building the horizontal framework is a critical step in ensuring your garden fence stands the test of time. These rails act as the skeleton of your structure, providing the necessary support for your pickets or panels. Taking your time during this phase will pay off with a much stronger final result.

Measuring and Cutting Horizontal Rails
Precision is vital when you are installing fence rails. You must measure the distance between your posts accurately to ensure each rail fits snugly. Even a small gap can weaken the overall connection, so take your time with every cut.
Use a high-quality saw to make clean, straight cuts across your timber. If you are working with H4 treated pine, ensure you seal the cut ends with a timber preservative to prevent moisture from entering the wood. This simple step helps maintain the longevity of your materials.
Securing Rails to Posts Using Proper Joinery
The way you attach your rails to the posts determines how well your fence handles wind and weather. Using proper joinery techniques, such as birdsmouth cuts or heavy-duty galvanized brackets, will significantly enhance the strength of the assembly.
If you choose to use brackets, ensure they are rated for outdoor use to avoid premature rusting. For a more traditional look, a birdsmouth joint allows the rail to sit flush against the post, creating a seamless and robust connection. Always use screws rather than nails for a tighter, more reliable hold.
Ensuring Structural Integrity and Alignment
Maintaining fence structural integrity requires constant checking as you work. Use a spirit level to ensure every rail is perfectly horizontal before you fasten it into place. A crooked rail will make the final installation of pickets or panels much more difficult.
Check that your frame remains square by measuring diagonally from corner to corner. If the measurements match, your frame is perfectly aligned. Keeping these elements level and square ensures that your finished fence looks professional and stands strong for years to come.
Installing Pickets or Fence Panels
Your garden fence design ideas finally come to fruition during this critical installation phase. This is the moment where the structure transforms from a simple skeleton into a functional and attractive boundary for your property. Taking your time here ensures that the final result reflects the hard work you have invested in the planning and framing stages.
Spacing Pickets for Aesthetic Appeal
Achieving the perfect look often comes down to the precision of your fence picket spacing. Using a simple spacer block is a professional trick that guarantees consistent gaps between every board. This small tool saves you from constant measuring and prevents the visual clutter of uneven lines.
“Precision in the early stages of attachment prevents the need for costly corrections later. A consistent gap is the hallmark of a master builder.”
Fastening Panels to the Framework
When you begin attaching your panels, always select the correct length of screws or nails to avoid splitting the timber. It is often helpful to pre-drill holes if you are working with dense, high-quality wood. This extra step protects the integrity of your materials and ensures a long-lasting hold against the elements.
Consider the following guide to help you choose the right approach for your specific fence style:
| Picket Style | Recommended Gap | Fastener Type |
|---|---|---|
| Classic Dog-Ear | 20mm – 50mm | Galvanized Nails |
| Modern Vertical | 10mm – 20mm | Stainless Screws |
| Privacy Panel | 0mm (Butt Joint) | Exterior Wood Screws |
Maintaining Consistent Height and Level
Maintaining a consistent height and level throughout the process is essential for a clean, professional look. Use a long spirit level or a string line to check your progress every few boards. If you notice a slight drift, adjust your fence picket spacing immediately to bring the line back into alignment.
A level fence not only looks better but also performs better over time. By keeping your panels uniform, you ensure that the weight is distributed evenly across the rails. This attention to detail will significantly enhance your garden’s overall aesthetic appeal for years to come.
Adding Gates and Finishing Touches
Adding a gate is the final piece of the puzzle that brings both security and convenience to your garden. While the main fence provides the boundary, the gate serves as the primary point of interaction. Taking the time to finish this part correctly ensures your hard work stands the test of time.

Constructing a Sturdy Gate Frame
Successful garden gate construction relies on a frame that can support its own weight without sagging. You should use diagonal bracing to distribute the load effectively across the structure. This simple addition prevents the gate from dropping over time, keeping it perfectly aligned with your fence line.
Installing Hinges and Latches
Once the frame is solid, it is time to attach the hardware. Always choose high-quality hinges and latches that are specifically rated for outdoor use in New Zealand’s variable climate. Using stainless steel or galvanized options will prevent rust and ensure smooth, quiet operation for years to come.
Applying Protective Stains or Paints
The final step in your project is protecting timber fences from the elements. Applying a high-quality stain or paint seals the wood against moisture and harmful UV rays. This process not only extends the lifespan of your timber but also allows you to customize the look to match your home’s exterior perfectly.
Remember that consistent maintenance of these finishes will keep your fence looking fresh. By sealing the wood properly, you protect your investment from rot and decay. Enjoy the satisfaction of a job well done as you admire your completed garden boundary.
Maintenance Tips for Long-Lasting Fences
Even the most robust fence requires a little love to survive the harsh New Zealand elements. Consistent timber fence maintenance ensures your boundary remains both functional and visually appealing throughout the changing seasons.
Regular Cleaning and Inspection
You should walk along your fence line at least twice a year to check for signs of wear. Look closely for moss, lichen, or dirt buildup that can trap moisture against the wood surface.
Early detection is the best way to avoid costly repairs. By identifying loose boards or corroded hardware early, you prevent minor issues from turning into structural failures.
Treating Timber to Prevent Rot and Decay
New Zealand’s variable weather can be tough on natural materials. Protecting timber fences with a high-quality stain or water-repellent preservative is essential for long-term durability.
Apply a fresh coat of treatment every two to three years to keep the wood fibers sealed. This simple step effectively blocks UV rays and prevents moisture from causing rot or decay.
Repairing Loose Boards or Hardware
If you notice a wobbly post or a loose picket, address it immediately to maintain the integrity of the entire structure. Tighten any screws or replace rusted nails with galvanized alternatives to ensure a secure hold.
Keeping your hardware in good condition is a vital part of protecting timber fences. A well-maintained gate and frame will swing smoothly and stay aligned for many years.
| Task | Frequency | Benefit |
|---|---|---|
| Surface Cleaning | Every 6 Months | Prevents mold growth |
| Hardware Check | Every 12 Months | Ensures structural safety |
| Timber Staining | Every 2-3 Years | Stops rot and decay |
Following this routine timber fence maintenance schedule will save you time and money in the long run. A little effort today keeps your garden looking its best for seasons to come.
Conclusion
Building a garden fence is a rewarding project that adds lasting value and privacy to your New Zealand home. You now possess the knowledge to navigate legal requirements and structural standards with ease.
Your commitment to quality materials and proper installation techniques ensures a sturdy boundary for years to come. Taking the time to follow these professional steps protects your investment against the unique climate conditions found across the country.
Consistent care remains the secret to keeping your timber or steel structure in peak condition. Regular inspections and timely repairs will prevent decay and keep your property looking its best.
We hope this guide provides the confidence needed to complete your fencing project successfully. Enjoy the enhanced security and beauty of your newly defined outdoor space.
FAQ
Do I need a building consent for my garden fence in New Zealand?
Why is H4 treated pine recommended for fence posts?
How can I ensure my fence remains straight during construction?
How long should I let the concrete cure before finishing the fence?
What is the best hardware to use for coastal properties?
How do I handle the cost of a boundary fence with my neighbor?
How can I prevent my pickets from splitting when I fasten them?
What maintenance is required to protect the fence from UV rays?
If you're planning a landscaping project in Tauranga or the Bay of Plenty, get in touch with Brooks Landscapes to discuss your ideas and see how we can help bring your outdoor space to life.